
17.5.1.2. Measuring
In this mode you would first need to make sure that you have a spot measurement device such as XRite EyeOne connected to your computer. Set the mode to Lab and then click on the Measure button.
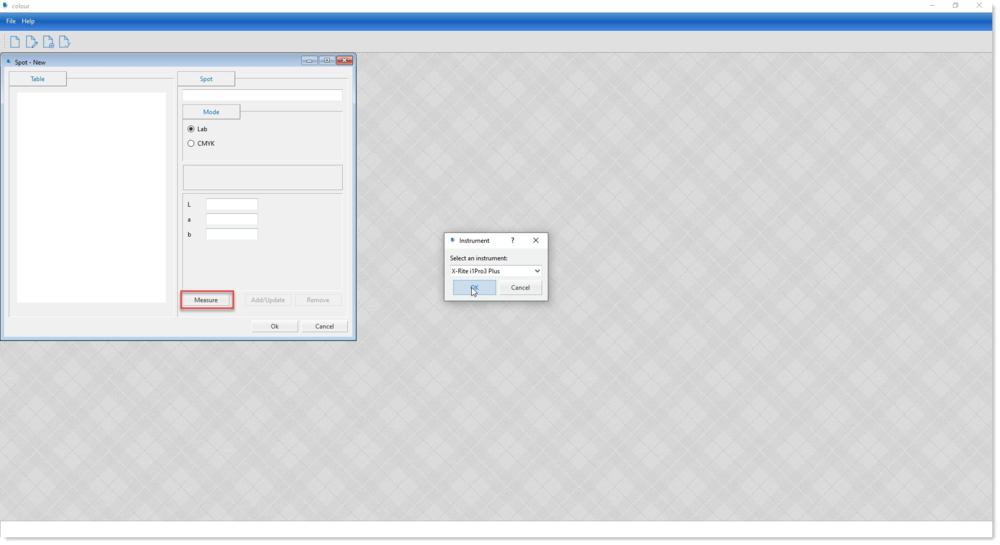
Select your instrument model from the drop down list and click on the OK button.
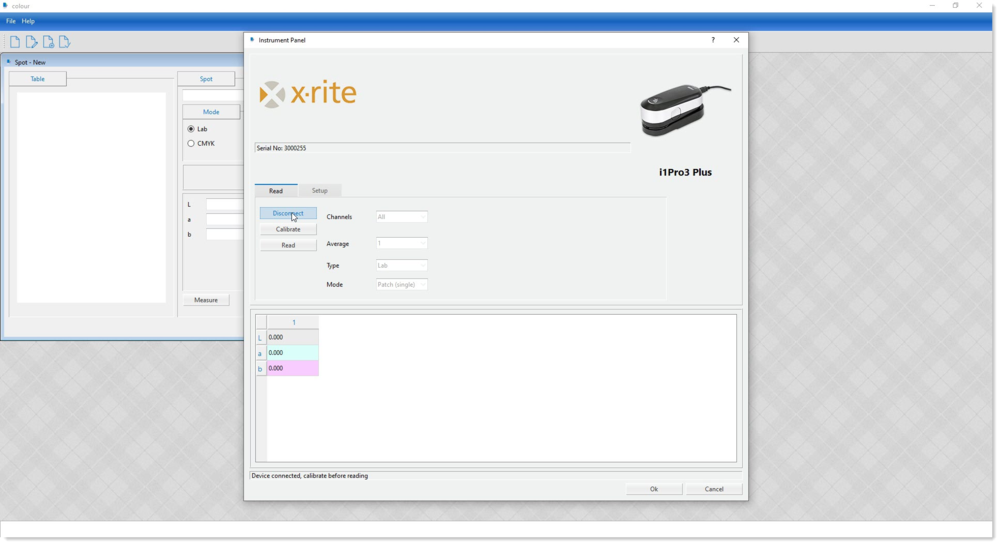
Now press the Connect button to find and attach to your device. Please make sure that no other application is currently using your instrument.
Carry out the calibration procedure for your device by clicking on the Calibrate button and get it ready to read the colour sample that you require.

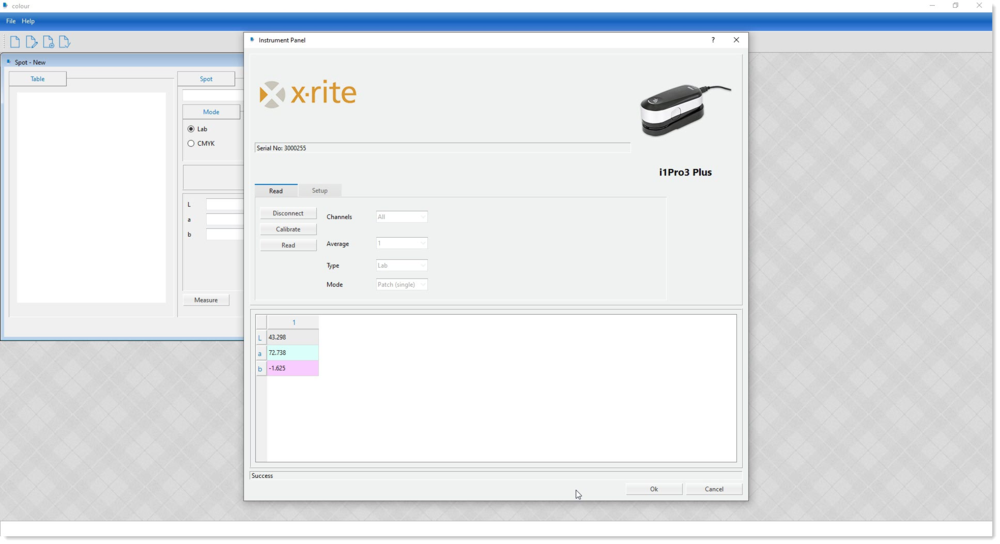
Place the instrument on the sample that you are measuring and then click the Read button. Press the side button on the instrument to read the colour.

The colour values captured will now be shown in the table.
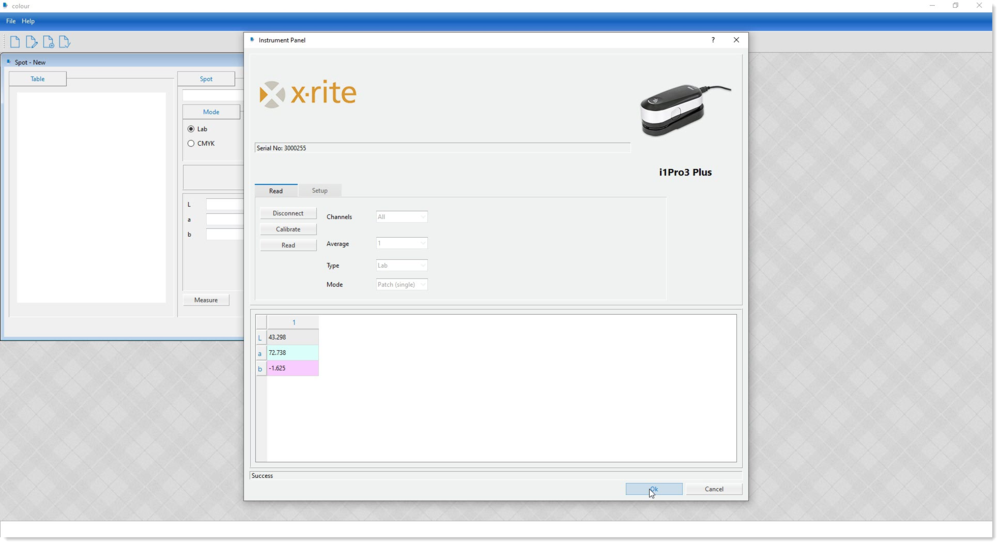
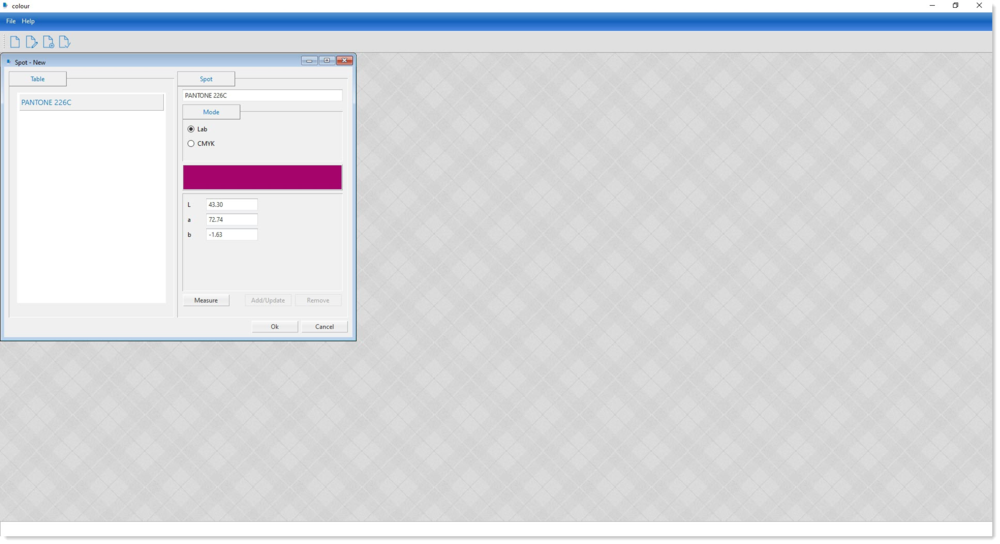
Click on the OK button to save and exit the window. The Lab value measured will now be shown in the entry boxes.
Assign a name to the colour and click on the Add/Update button to add it to the table. The colour measured will now be shown graphically for your information.
Repeat the procedure to add more to the spot table. Once you have finished with the measuring click on the OK button The system will now prompt you for spot table name. The system will assign a name automatically but this can be over-ridden by the user if needed.
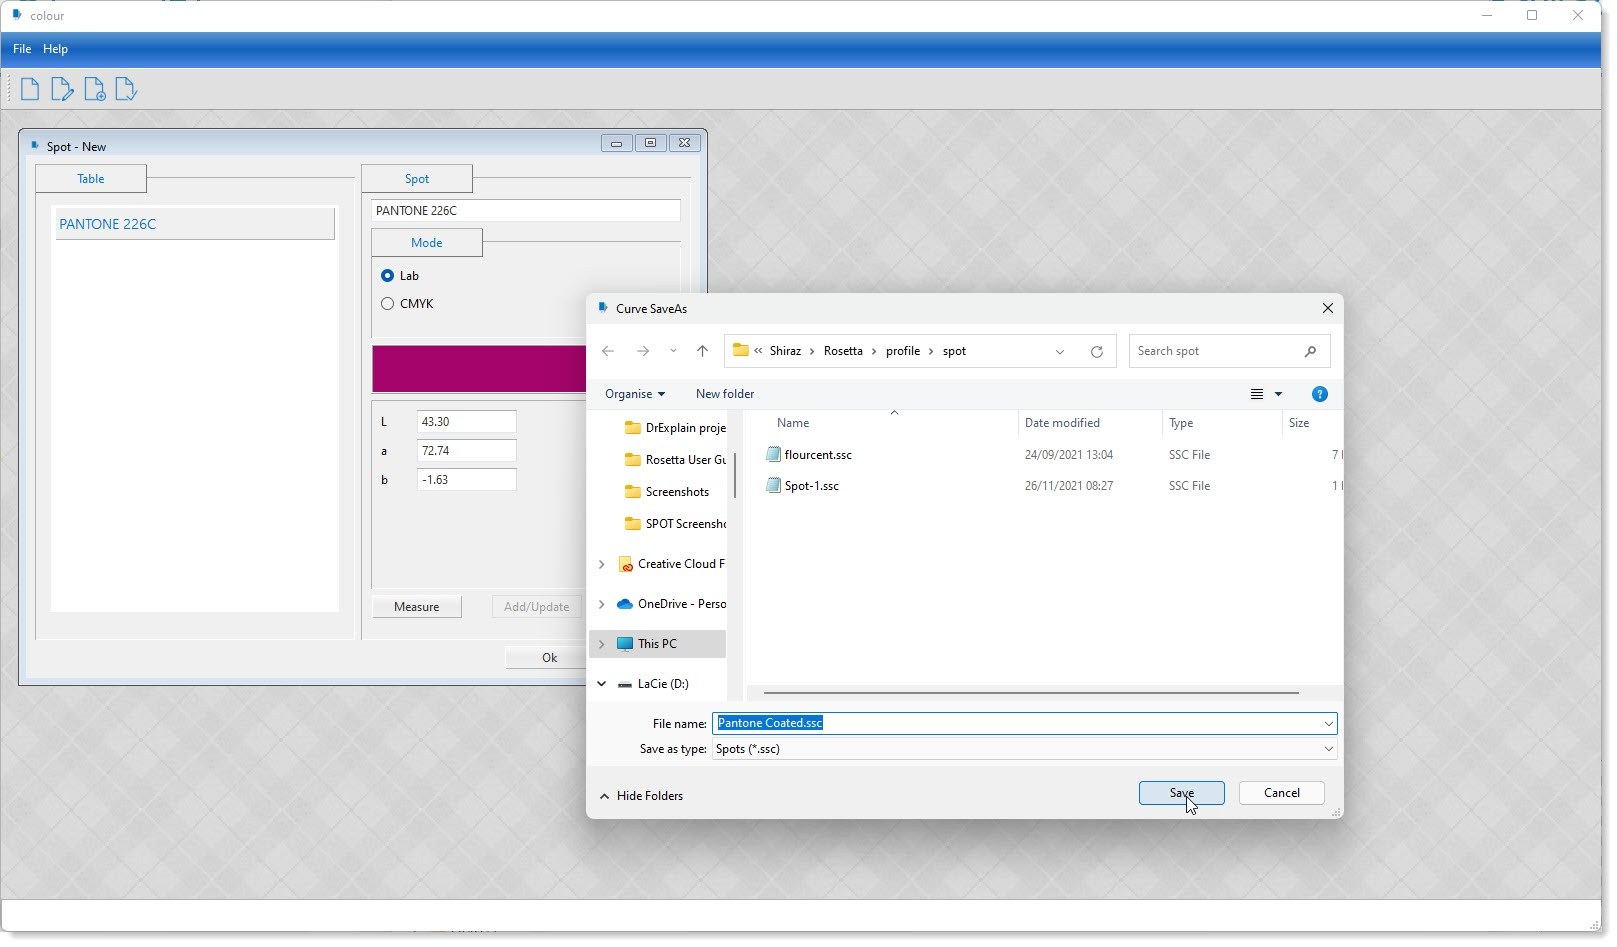
The spot table files have an file name extension of .SSC and are save in a folder called 'spot' under the 'profile' folder.