
17.4.1.1.1.3. Print Modes
For each printer make and model the manufacturer defines a number of parameters and settings that directly affect the print quality, speed and other related aspects of the print. Each parameter can be set to a number of valid settings as recommended by the OEM. Each print mode is a valid combination of these parameters. Some of these parameters have multiple valid settings such as 'Print Direction' that can be Uni or Bi-directional. Many of them are pre-selected in the Profile Template and should not be changed.
Each parameter can be set to one of three states as outlined below:
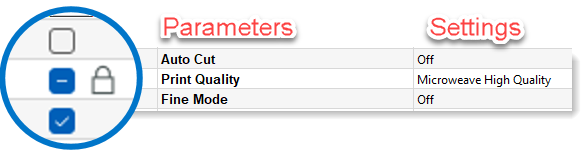
-
Blank (not selected)
-
Selected with lock
-
Selected
If a parameter is not ticked (blank) then the print parameter is determined by the print queue's default template. Please refer to section 9.1.1. Configuration for more information on this.
If a parameter has been selected and locked then it will be shown as greyed out and can not be changed in the Client applications such as Studio & Layout. This is useful if for example you are profiling a very thick media that the printer cannot cut without causing problems then setting ‘Auto Cut’ to Off and locking it, ensures that users cannot override.
If a parameter only has a tick mark (selected) then it can be changed by the user in Client Applications but every time that profile is selected it will always revert back to the default value as set here.
It is also possible to edit the parameter list and select only a range of the valid parameters. This again is useful if you only want to allow for a limited number of allowable parameters to be selectable at the Client Application stage. For example if your printer can print at many different number of passes but you would only want for two of these passes to be available for selection then click on the edit button (triple dots) and then deselect the ones that are not required by unticking them.
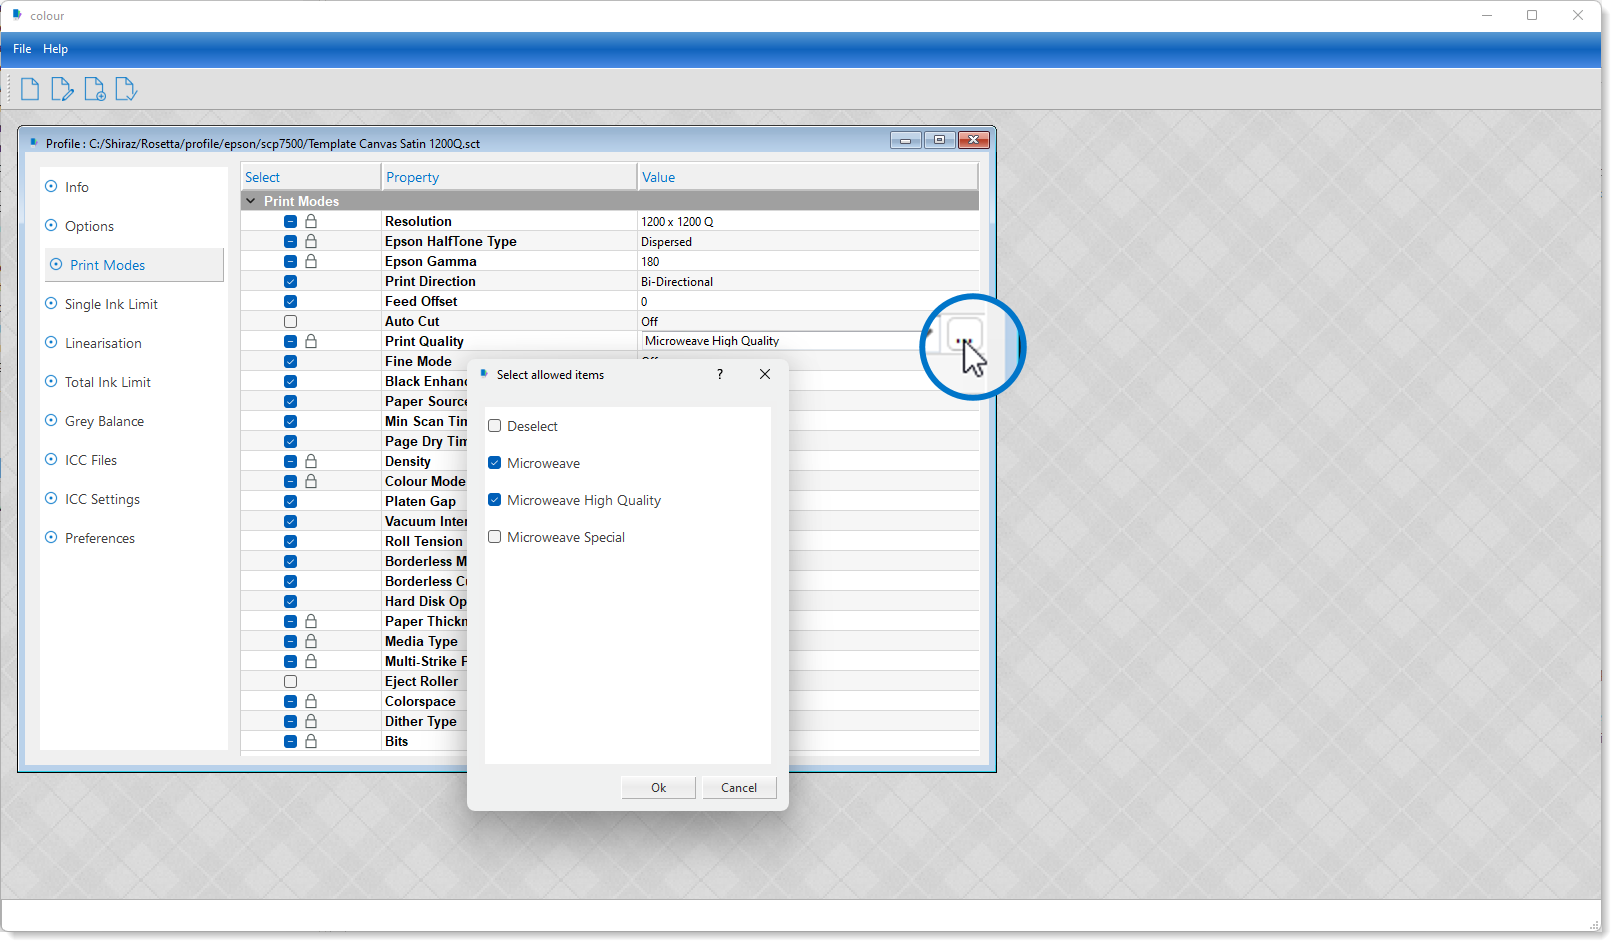
Please be aware that any parameter that is locked must not be edited as it would result in errors or no printing when processing jobs. As all parameters have already been set in the template, there is usually no need to change any of these.
Once you have completed this part you can skip to 'ICC Files' step, where you can select and print the RGB ICC patches for your favourite profiling software.
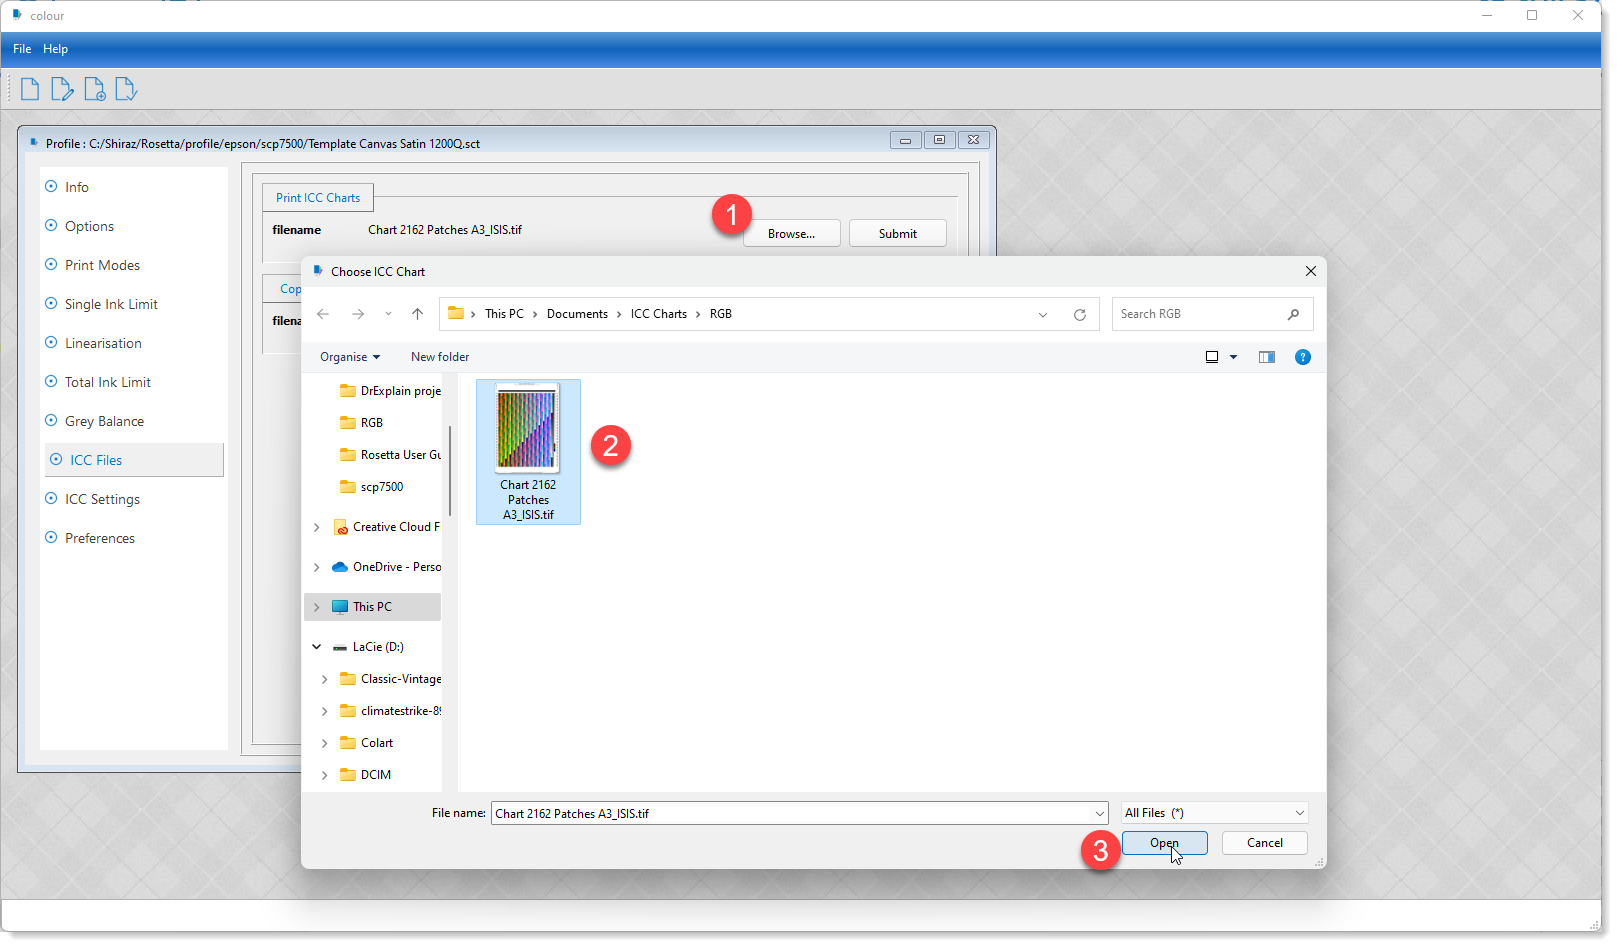
Click on the Browse button and then locate the ICC patches that you have made for your profiling purposes. Once selected click on the Submit button to send it to the printer queue for printing with all the parameters that were set in the previous steps.
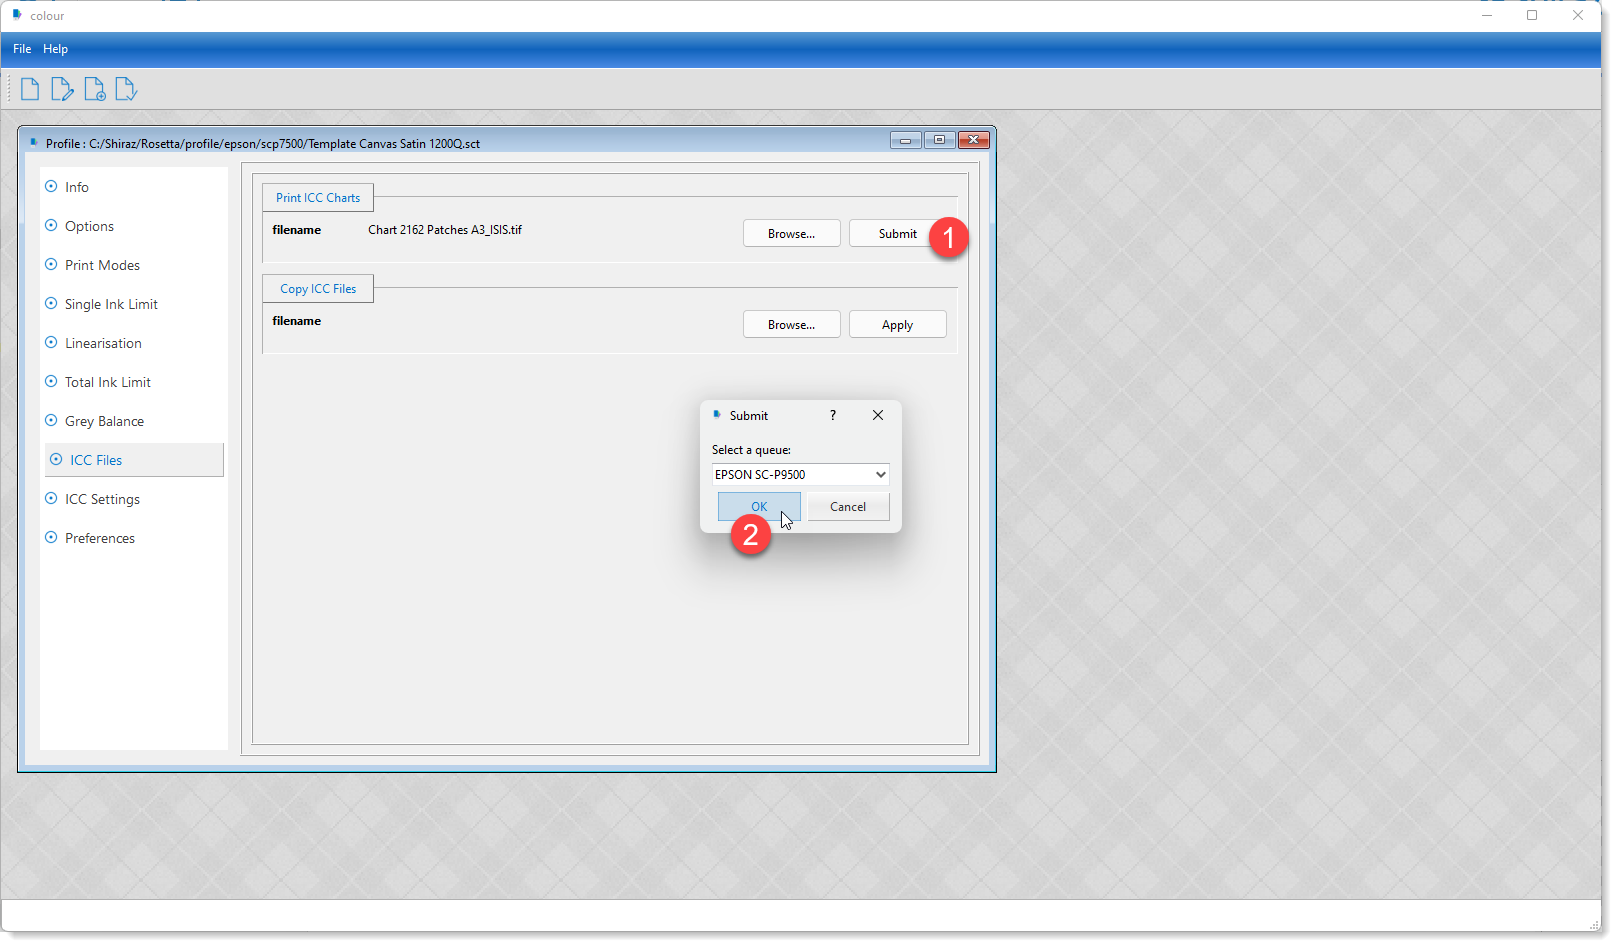
The Colour module will prompt you with the list of the printer queues on your Server with the default one being the one that you started with. Once you click OK the print job will next appear on the printer queue for your printer on the Server as shown below.

You should now print the chart as normal and let it dry for a at least 30 minutes to make sure that it is dry and ready for measurement.
The next step is to actually measure the chart(s) and create the printer RGB profile according to your profiling application instructions. We recommend creating large high quality ICC profiles in version 4 if possible.