
17.4.3.3. Total Ink Limit
In this step we will set the limit for the total ink usage. This is an important step in the profiling procedure as most media are not able to take on the maximum amount of inks that a printer is capable of printing. This stage also results in major ink saving that has direct effect on printing costs. The Shiraz Rosetta RIP employs a proprietary ink limiting technology that reduces the ink usage to a minimum without unnecessarily sacrificing the overall colour fidelity of the printed images.
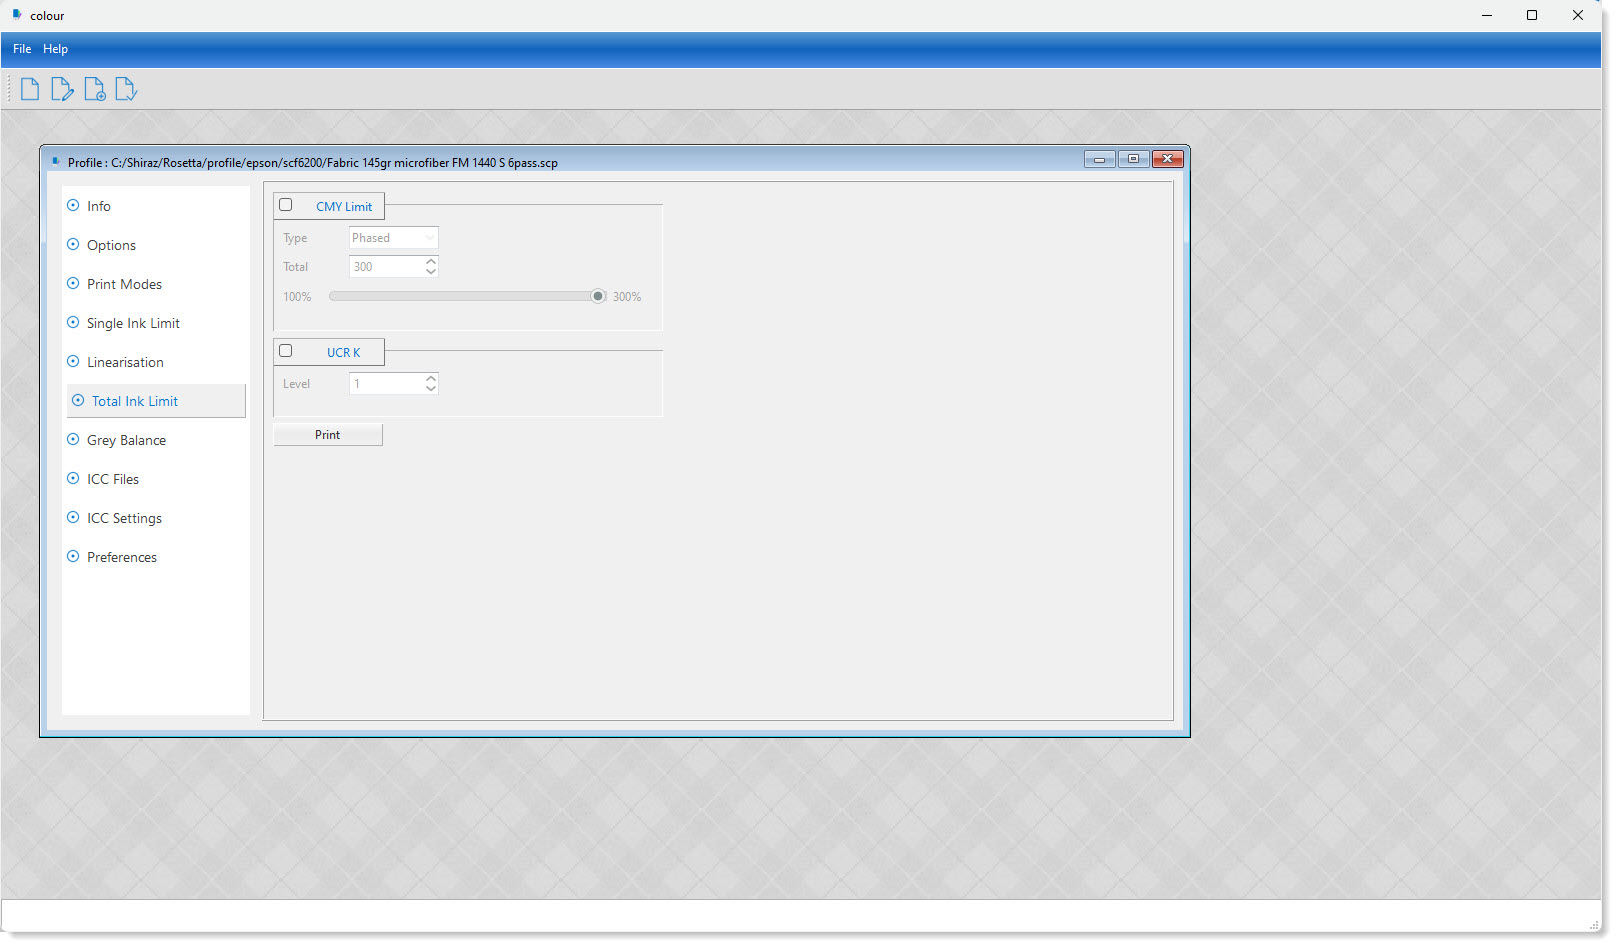
To activate the Ink Limiting option select this option by clicking on the CMY Limit option. You will now be able to set and apply the required ink limiting.
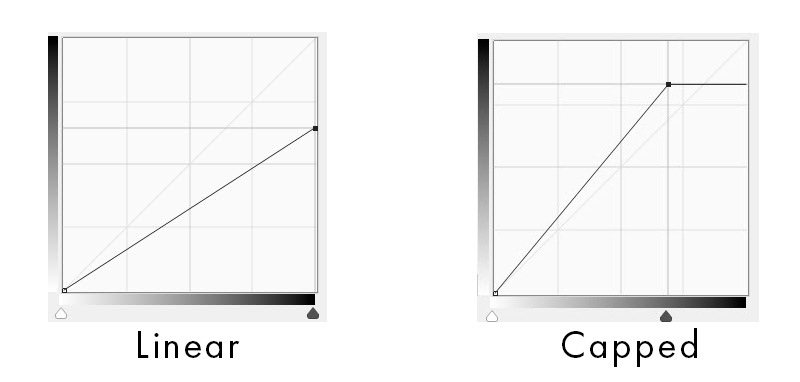
The RIP can limit the total ink applied in a number of different methods. If the Linear option is selected then the ink limit is applied to the whole range in a linear fashion. If Capped is selected then any value above the chosen limit is set to the limit value and any values below the limit are unaffected. This is shown graphically below.
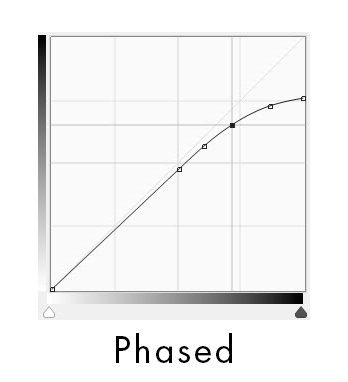
Phased option enables the RIP to only reduce the inks in the areas where the total ink quantity is above a certain limit. The reduction is applied in a non-linear and logarithmic manner that preserves better colour gamut. The Phased option is graphically demonstrated below.
There are additional Phased options that extend the Phased option by considering the black ink as well. You would only need to use these additional options if you are getting over-inking using the Phased option.
The RIP can also be instructed to apply its own unique under colour removal (UCR K) function in order to control the amount of ink being applied in the four colour areas. The level value decides the amount of limit being applied. This option is only effective when using the Error Diffusion screening option.
To access the total ink limit that should be set you would need to print the included Total Ink Limit Chart and then visually inspect and decide on the value required. We would recommend that you start with a value of 210$ as the starting point for the CMY Limit and then increase or decrease this value (in 15% steps) based on the print results as will be explained now.

Examine the print thoroughly, there must not be any kind of over inking, the drying time should be acceptable and the colours in the dark end must not be too light. For matte paper you should allow an hour of drying time before you check for curling etc. If there are any kind of over inking then you must reduce the total ink value, in steps of 15% is fine, and print again. If you still have problems with over inking when the Total Ink value is at 100% then you must go back two steps and reset linearization and reduce Single Ink Limit, mainly for C, M and Y channels.
On the other hand if the colours in the dark end are too light, and there are no sign of over inking you can increase the CMY Limit. The CMY Limit should normally be as high as possible without any over inking.
The aim is to have an ink limit that gives a good gamut of colour while not causing any over-inking or drying issues.