
17.4.3.5. ICC Files
Having completed the previous steps successfully you are now ready to print the ICC charts for your profiling software that will then measure and generate the ICC profile for it. This ICC profile will then has to be set as the printer profile in the profile table.
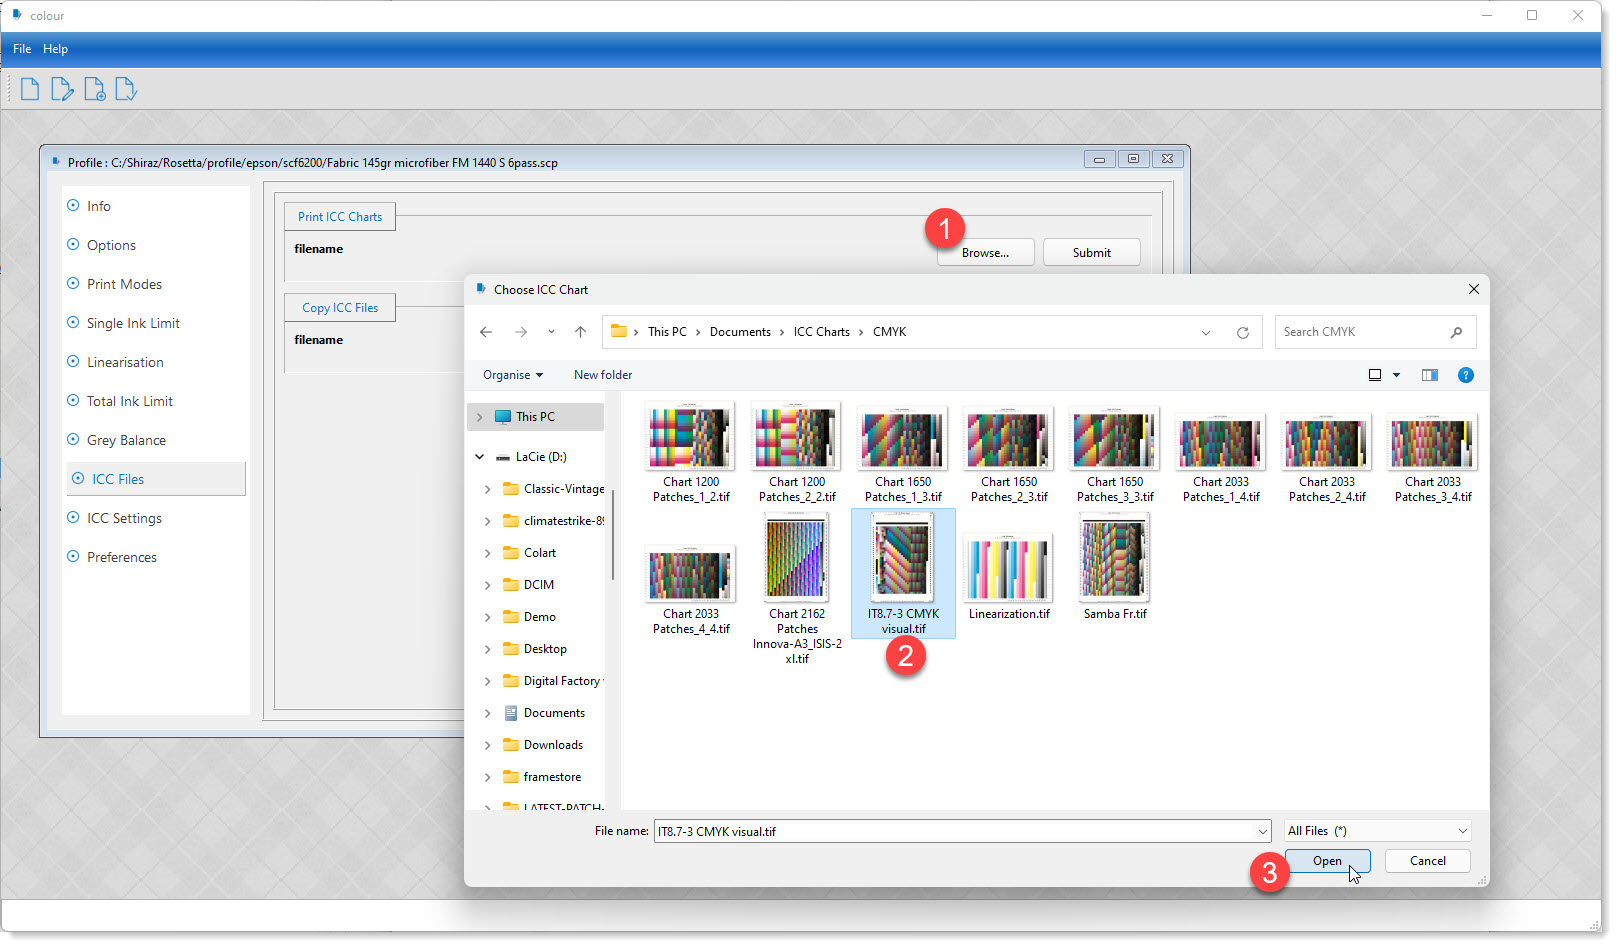
In this section click on the Browse button (1) to then locate and select (2) the ICC chart that you normally use for generating the ICC profile for your profiling software. Once you have selected the file click on the Submit button to send it to the corresponding printer queue on the Server.
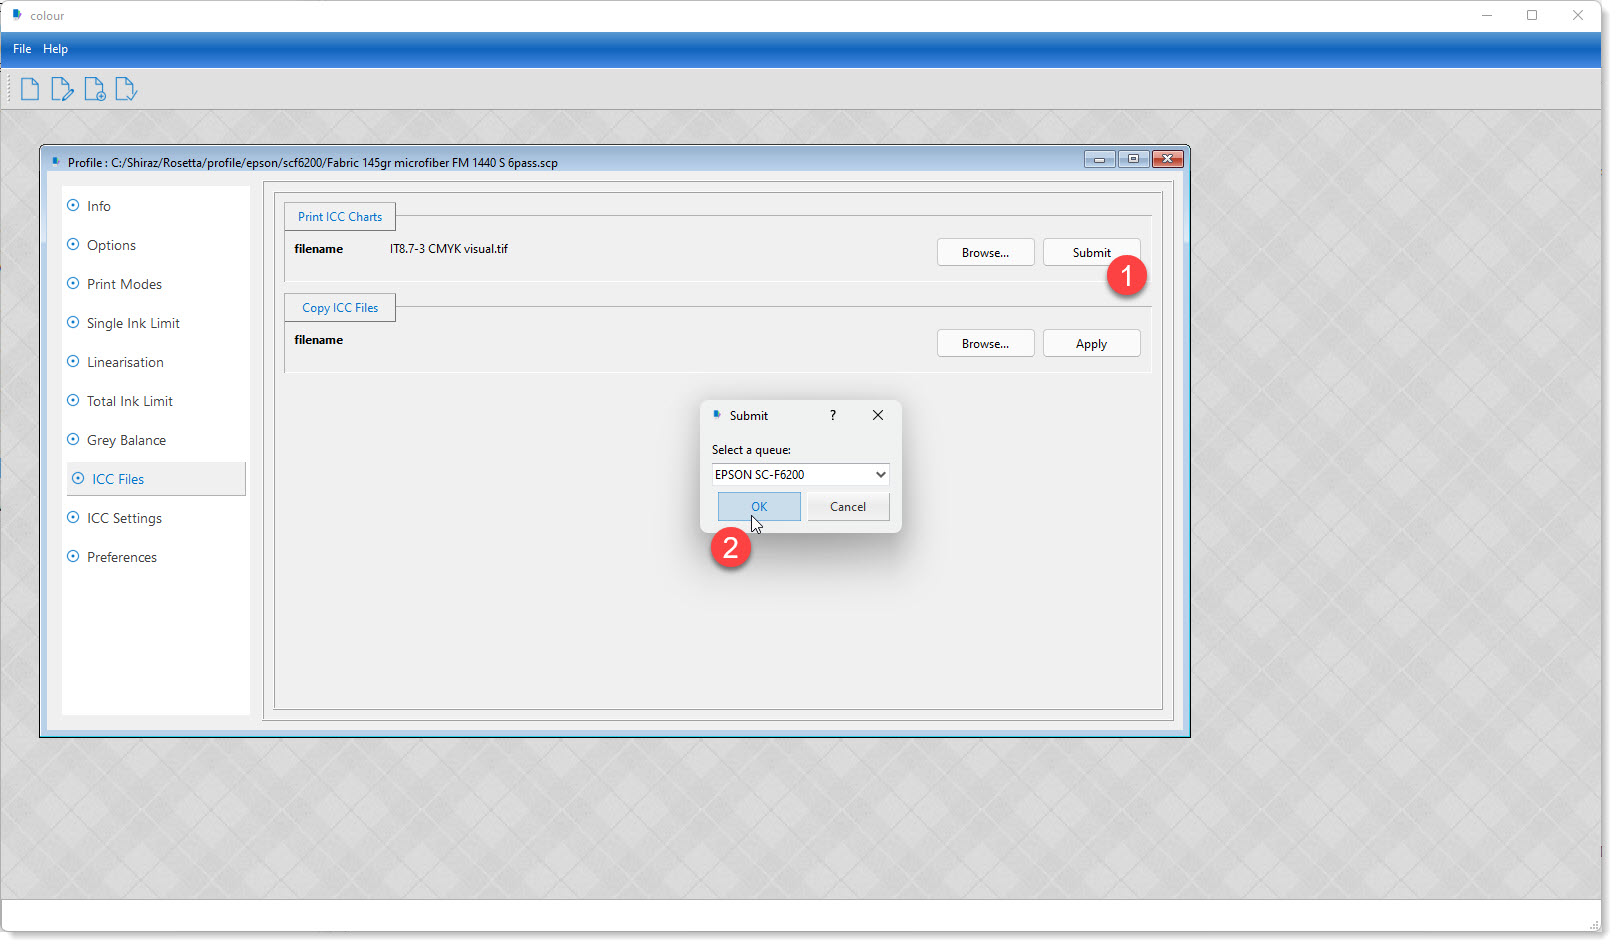
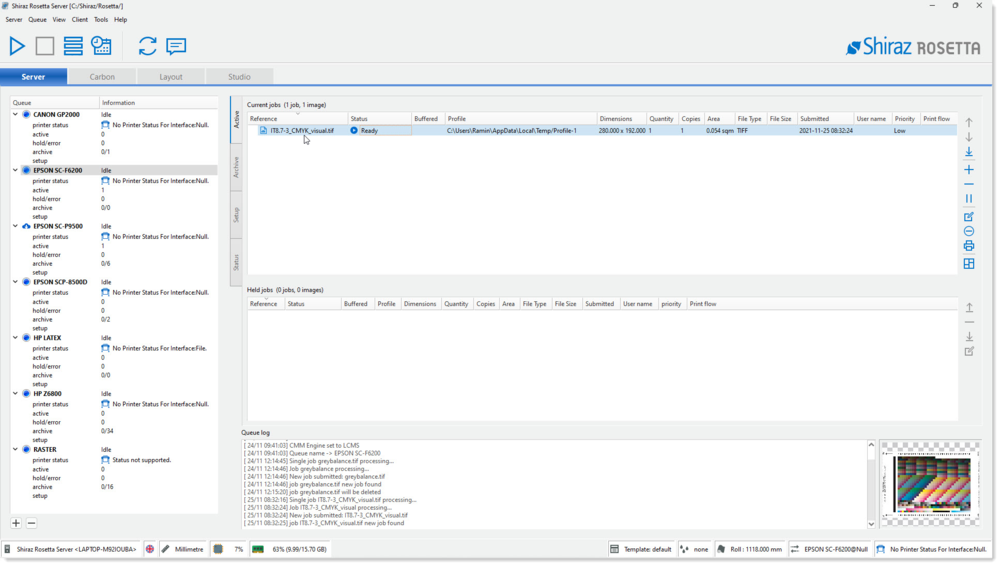
The system will now generate a job with all the settings (print mode, ink limiting, linearization, grey balance) assigned to it for the selected ICC chart. This will appear on the RIP queue for the corresponding printer.
If you have more than 1 file for your ICC chart then repeat the procedure above to submit these. For submission of multiple files you could set the Nest option in the Preferences section to On or alternatively nest them on the print queue.
Print the job on the queue as normal and let is dry before measuring it in your profiling application. Create the ICC profile using the high quality setting and V4 version if available. There should be no need for you to reduce the total ink limit in the ICC generation dialogue as this has already been done in the RIP. This should result in a better ICC profile in terms of accuracy and quality.
You now need to assign this newly generated ICC profile as the printer profile in the current profile table.
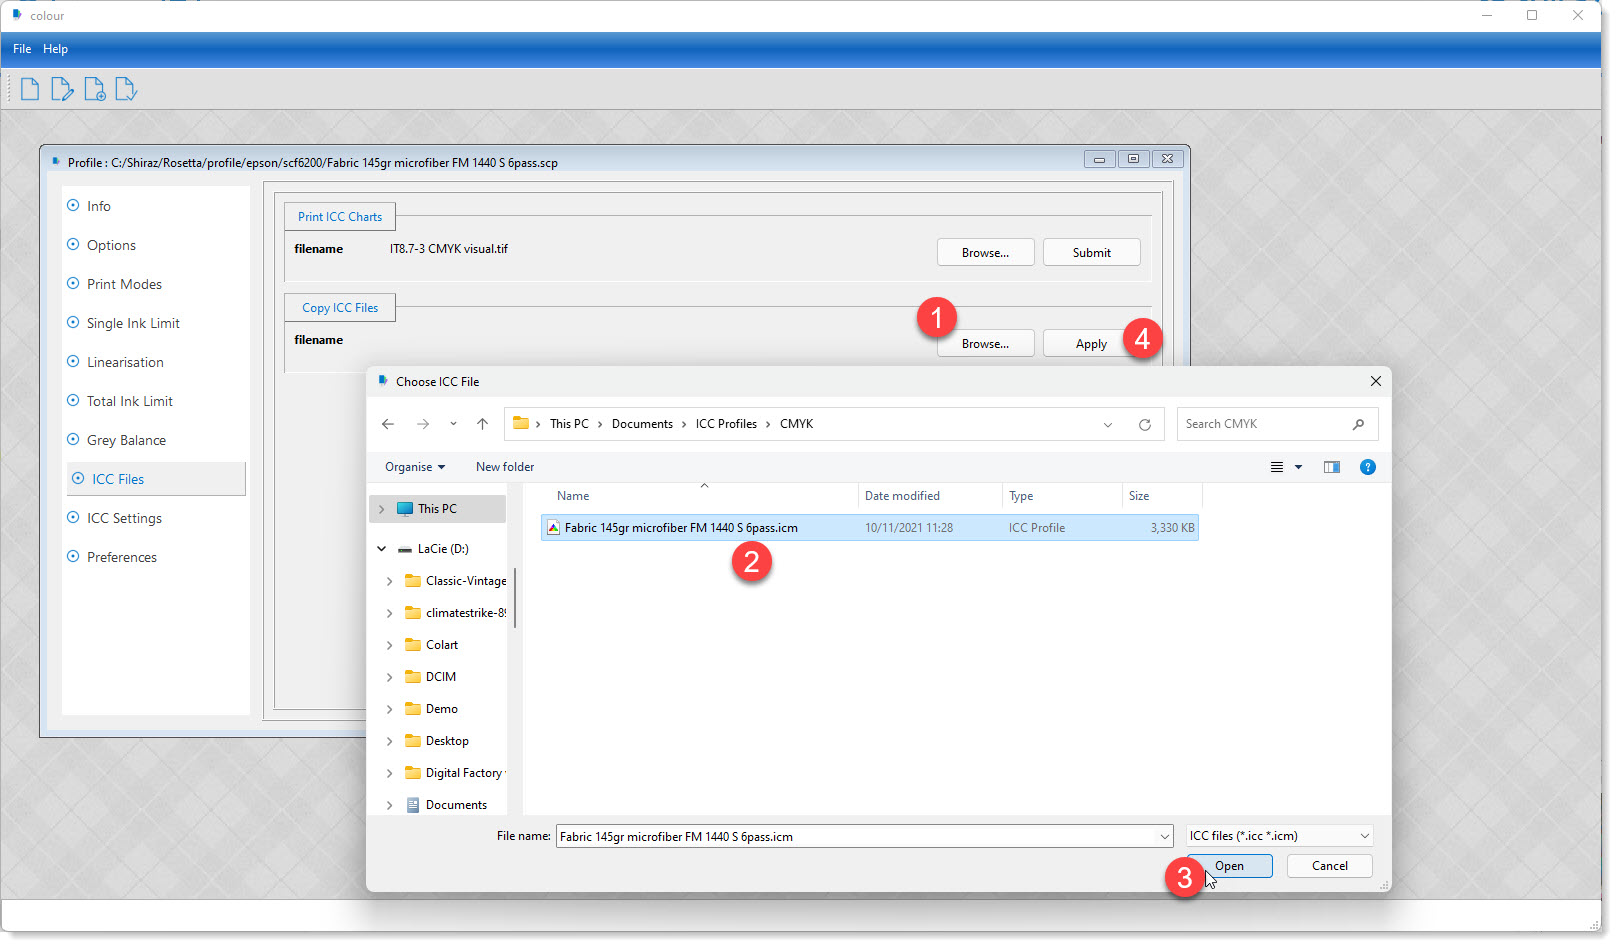
Browse (1) and then select the ICC profile (2). Once selected (3) the profile name appears for your confirmation. Now click on the Apply button (4) to copy and assign it in the profile table as your printer profile.