
14.3.1. Studio Client (In-House)
Click on the Studio tab and then click on the AOD Login icon to login to your AOD account.
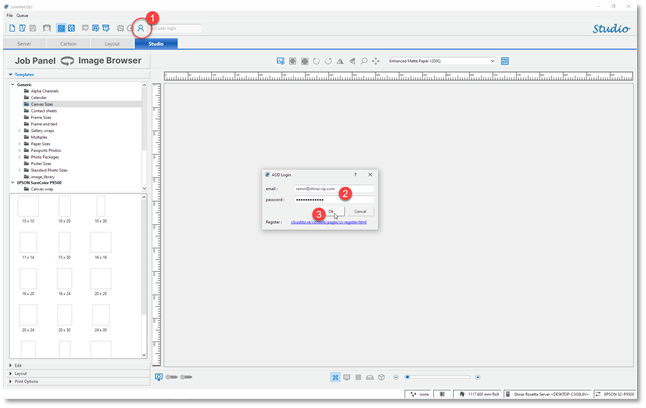
The system will now show the login progress and if there are any issues highlight these to the user.
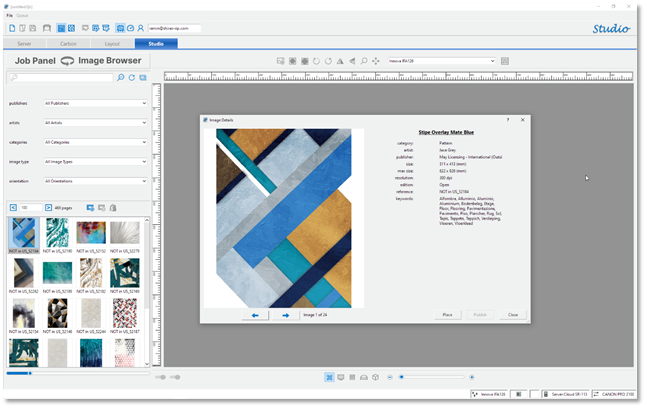
Once the login has been successful then the initial AOD images will be shown in the art browser tab. You can use the various categories, parameters, and search keywords to browse and locate the required piece.
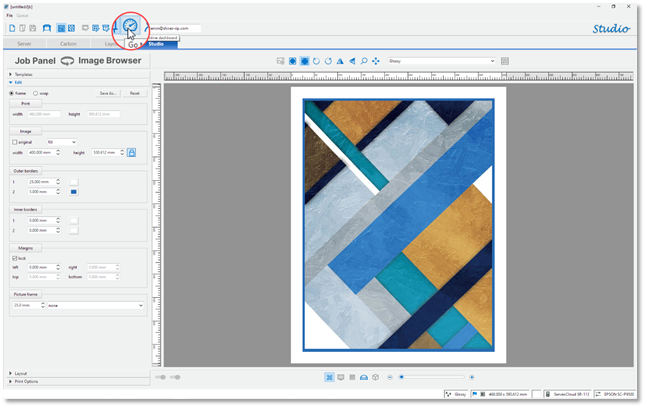
To view more details on the selected art, double-click on it. The image details window will now pop up and will display a high-quality thumbnail of the image as well as detailed information about it. This information includes the artist and publisher names minimum and maximum printing sizes allowed. You can use the arrows to navigate between the images and use the Place button to select the image.
Once the image has been placed you can use all the usual features of the Studio client to design the required finished work. These include sizing (within the limits allowed), adding borders and wraps.
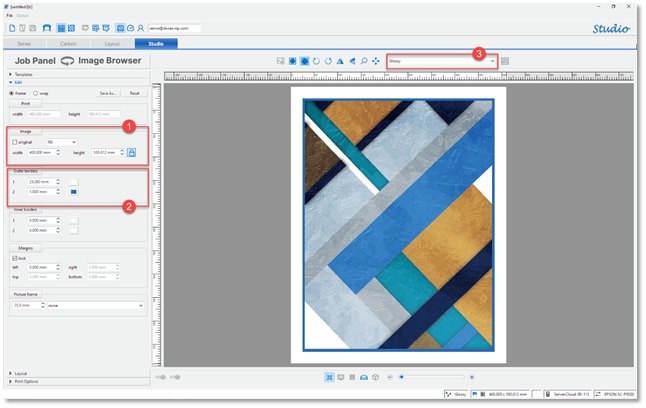
In the example above, the image was first sized as needed (Step 1) then the outer borders were added (Step 2) and then finally the required media for printing was selected (Step 3).
The job can now be submitted to the cloud queue that was setup on the Server previously for printing. Click on the Submit icon on the toolbar (or Ctrl+P / Command+P).
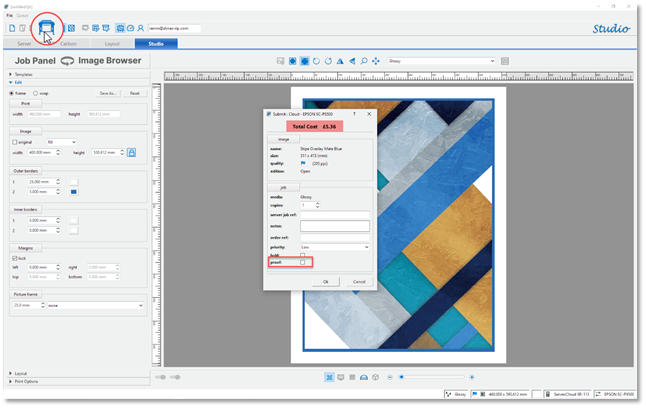
The Submit dialog window will now be shown that shows various details about the image and job as well as the image royalty cost (highlighted in red). User can also enter their own notes and order reference numbers if required. If you would require a proof of the print without incurring any costs, then select the Proof option at the bottom of the window. The system will then print the image exactly as design with a watermark diagonally placed on the print. Please note that when the proof option is selected the royalty cost shown will be set to zero.
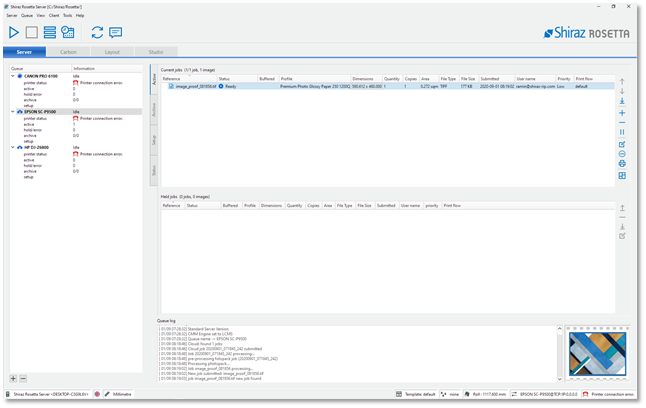
The AOD job will now be sent to the allocated cloud queue on the Server and can be printed as normal.
Once the image has been printed then the system will log the full activity of the job on the online Dashboard that can be examined by the user. To go to your online Dashboard and login to your account using your login credential click on the Dashboard icon on the Studio toolbar.
Your default web browser will now be directed to the Cloudstore login page and you can use your credential to login to your dashboard.
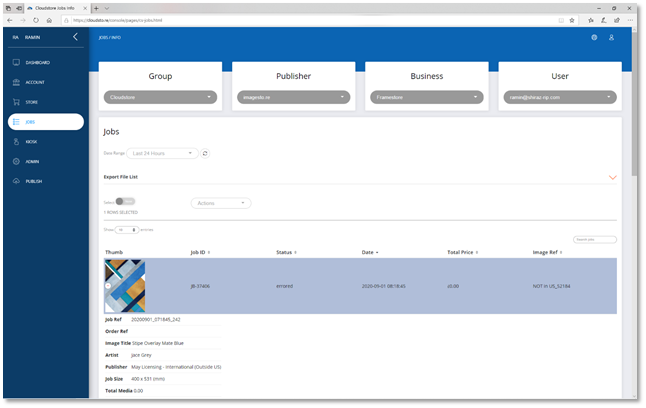
Here in the Job section you will be able to examine the list of the cloud jobs that have been submitted and their details and status.
Also available here is the Kiosk option that can also be used to create and submit AOD jobs to the cloud queues on the Server. This is an online tool that can also be used for your in-house use as well as your B2B customers.