
17.4.3.4.1. New
The user can create a colour curve for each primary (CMYK) colours. These curves can be different from each other or exactly the same if needed. The system uses a high quality cubic spline to create these curves.

To create a curve, first select the colour channel(s) required by ticking on their name. Once the colour is ticked its corresponding curve line becomes highlighted. Now you can add points (nodes) on this curve. To do this click on the Shift key on the keyboard and click the left mouse button. You could also click on the Add Point button to switch this mode on and then click where you would like to add the point. The system will add a point nearest to the current cursor position. Repeat this to add as many points as required.
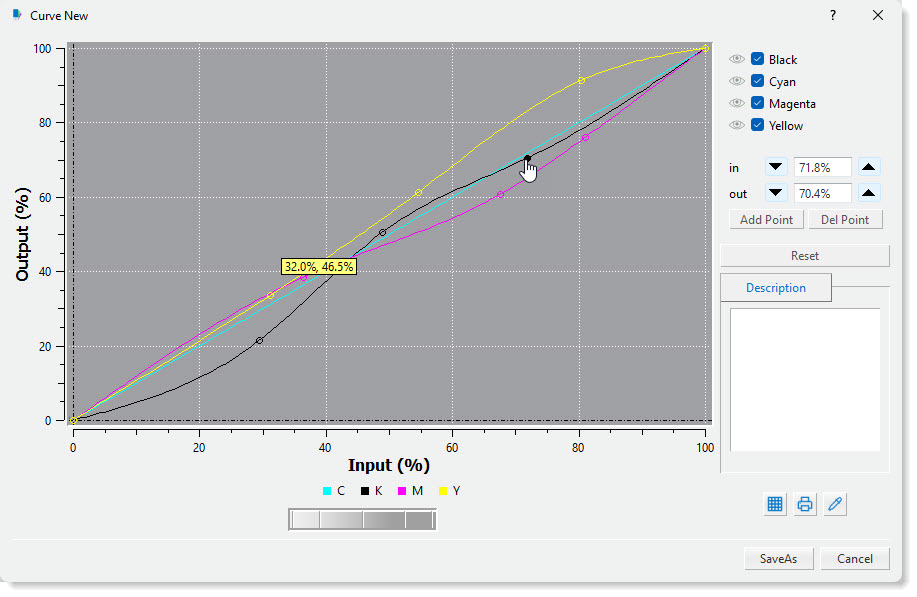
To move these points you can either move your cursor near to the node required and then click mouse button and drag the point or select the node (solid colour) and use the spinners for the ‘in’ and ‘out’ entries to change its coordinates values.
To remove a point on the curve, put your cursor near the required node and then press the Control (CTRL) key on the keyboard and left click the mouse button. Alternative click on the Del Point button and then move your cursor close to the node and click the mouse button.
To change to another colour channel first deselect the current one and then select the new channel. If you require that all the channels have the same curve characteristic then select all colours first before editing.
At the bottom of the window you will see a thumb wheel that can be used to show the input / output coordinates of the currently selected curve. To select the required curve click on the colour name
located above the wheel and then drag the thumb wheel in horizontal direction.
A description box is available for the user to enter a detailed description of the curve if required. This information is then shown when the user selects the curve in the Client applications.