
12.3.3. Canvas Gallery Wrap Template Design
In this next example we will go through the steps for creating a canvas gallery wrap template. The steps are very similar to the above example except for the additional step needed to define the canvas border size and type.
Gallery wrap refers to a method of stretching an artist's canvas so that the canvas wraps around the sides (stretcher or strainer bars) and is secured to the back of the frame. The frame is usually 40mm (1.5”) thick. The result is the hardware (staples or tacks) used for securing the canvas is not visible on the sides.
The sides of the canvas are prepared and primed in the same manner as the face, which may then be painted a solid colour or painted to continue the image appearing on the face. This method of stretching and preparing a canvas allows for a frameless presentation of the finished painting.
In canvas printing, the term gallery wrap refers to an image that appears on the sides of the frame as well as the front. The image on the sides is either a continuation or a reflection of the main image as well solid colours. The various gallery wraps options available in the software are graphically demonstrated below:
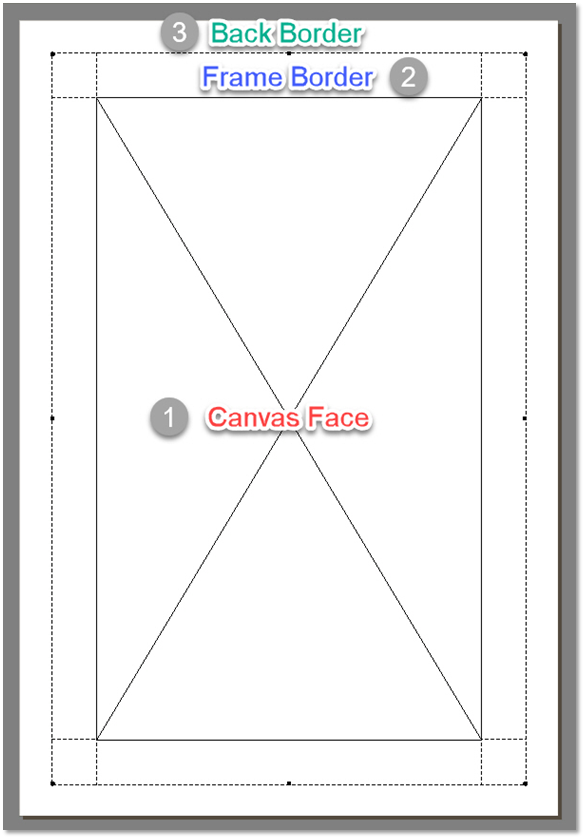
The image above details the various parts of a typical gallery wrap template. The ‘Frame Border’ is automatically generated by the software based on the image placed on the ‘Canvas Face’. The various effects available are shown below:
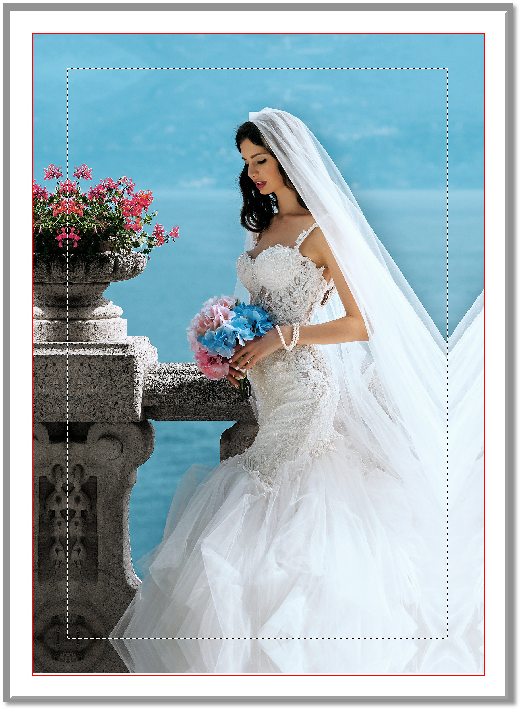
Mirror
In this mode the edge area of the image is automatically duplicated and mirrored to the size of the frame. In this way no part of the image is ‘lost’ to the frame area. This is the most popular method used.
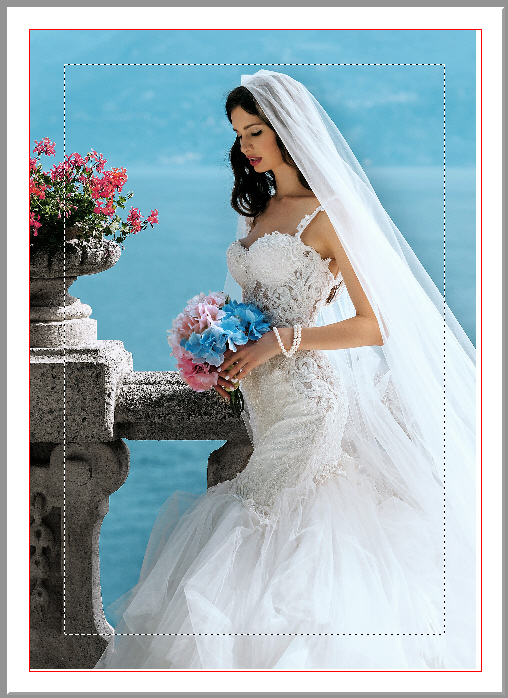
Image
Using the Image option as shown above then the image is scaled automatically to cover the face and frame area. In this way part of the image is used for the frame that can result in cropping of the image. This mode is only useful if the main subject matter is not close to the edges. In the above example it is clearly not a suitable option as the top of the Eifel tower will be ‘cropped’ out.
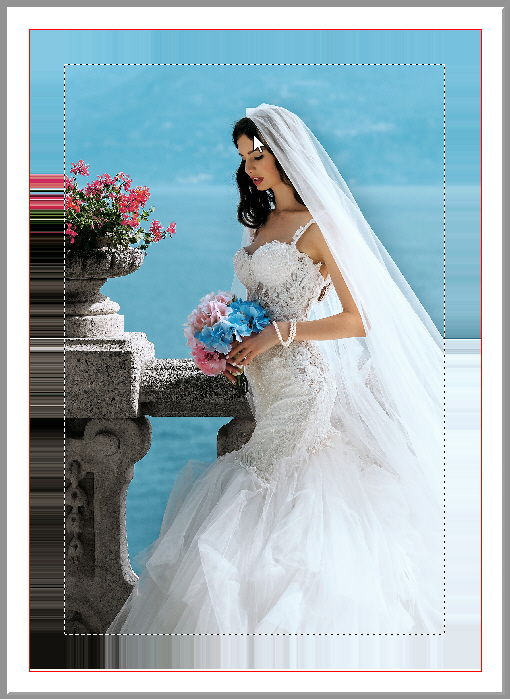
Stretch
The stretch effect simulates the manual stretching of the canvas around the frame. This option works particularly well for images that have uniform colours around their edges.

Sample
This option sets the frame to use a solid colour based on the average colour calculated for the placed image.

Picker
This option enables users to select any colour required for the frame by using the system’s colour picker feature.
None
As the name suggests this option leaves the frame area as blank. The first step in designing a canvas template is to first define the overall dimension. The total width is the total of Canvas Face Width + 2 x Frame Border + 2 x Back Border. Similarly, the total height is Canvas Face Height + 2 x Frame Border + 2 X Back Border.
In the example below we want to design a gallery wrap that has a Canvas Face of 400 x 600mm, a Frame Border of 50mm and a Back Border of 30mm. So, based on that the total width and height would be = 560 x 760mm.
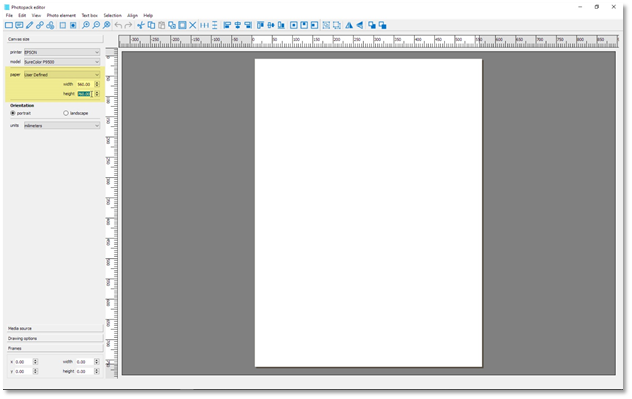
Once we have defined the overall dimensions as illustrated above then we can draw the Canvas Face and define its width/height and X/Y position.

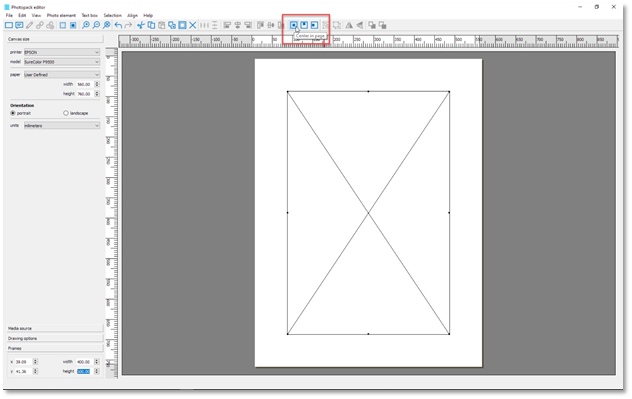
Next step is to place the Face area centrally within the canvas area. To do this, simply click on the auto centre icon as shown below.
Now we need to define the Frame Border size. This can be done by going into the Frames tab first and then entering the required value into the Bleed Size box as shown below.
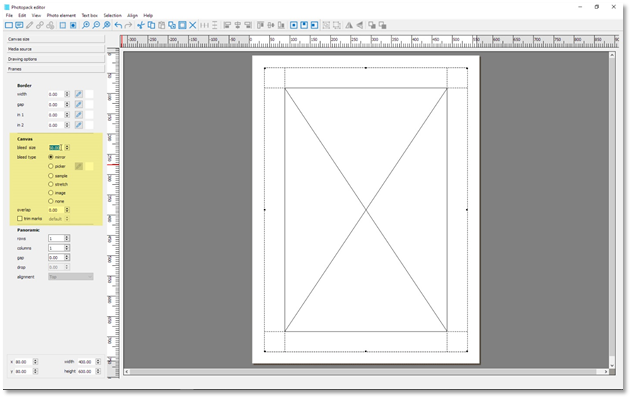
It is also here that we define the Frame Type which in this case is Mirror. The design is now complete, and we just need to save this as before.
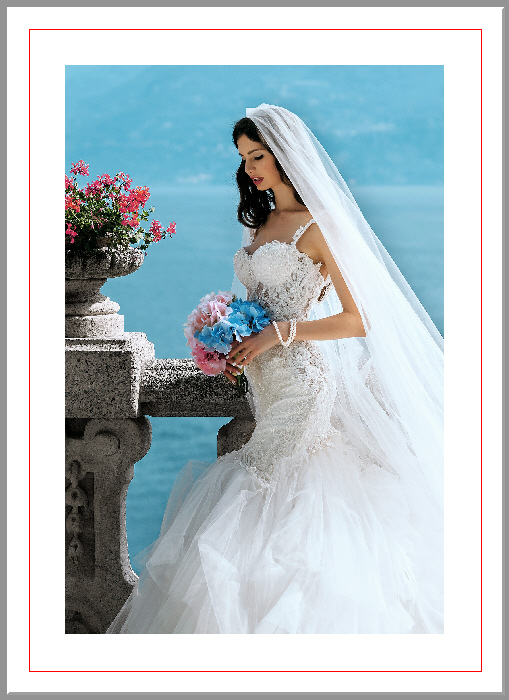
To use the photo pack, select the template from the folder that it was saved to and drag your image onto it. An example of which is shown above.