
16. Shopify (B2C)
Consumer solution of AOD involves offering the same service via web to public and processing online payment per order. Using this service anyone on the web can access art and order products to be delivered. Publishers or any individual Artist, Art galleries, Print Service Providers or any online business wishing to offer art on demand to consumers can utilise this service with minimum investment and complexity.
Shopify e-commerce platform is arguably the most popular solution on the market. Its comprehensive set of tools and features and ease of configuration and maintenance makes it particularly appealing to newcomers to this market.
To this end we provide a complete end-to-end connection to the Shopify ecosystem. This translates to the ability of automatically publishing products with complete list of variants, options, pricing, description, images, and other information. Additionally, any orders placed on the site will trigger the creation if the corresponding print job ready for production on the Rosetta Server.
The first step, of course, is to get a subscription account on the Shopify platform. Once you have signed-up you would need to contact us on shopify@shiraz-software.com in order that we can connect your Shopify site to our cloud system and Rosetta RIP.
After the previous step has been completed you should be able to see your Shopify site shown when you login to your AOD account on the Rosetta RIP.
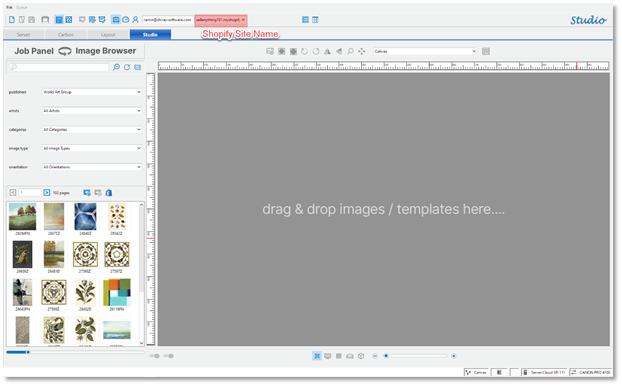
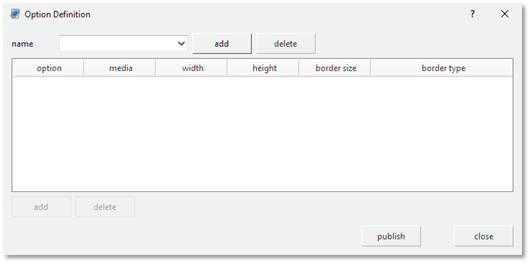
The first step is to setup the Options and Variants for the products that we would like to publish on our Shopify site. Click on the Options icon on the Toolbar to start the process.

Initially there are no options set so we will first add these. Each product can have up to 3 options. The options can be different from product to product. For example, one product can use size, colour, and style, and another product can use weight, finish, and material. In our case we would want to have Size, Media and Frame.
Click on the add button to enter your first option, Size.
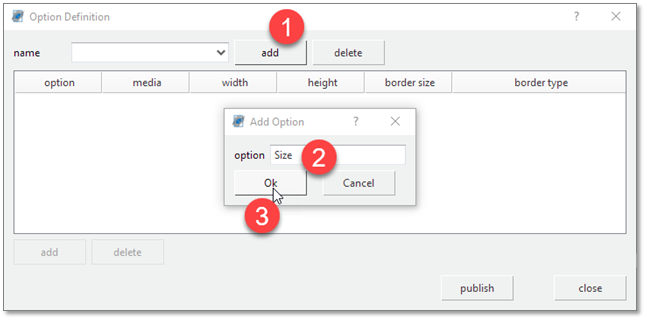
Repeat the process to add the remaining options, Media & Frame.
Next, we will enter the details of the Options by clicking on the add button located at the bottom left corner.
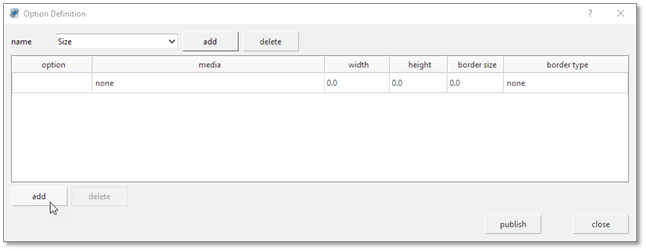
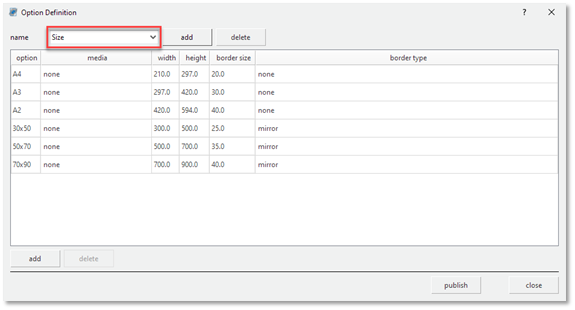
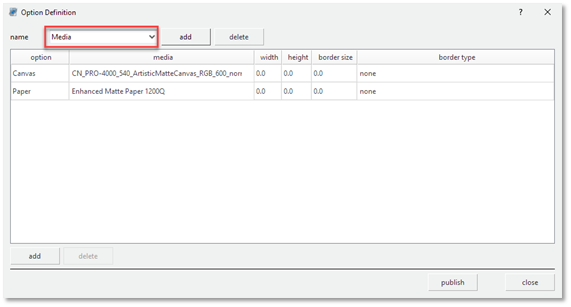
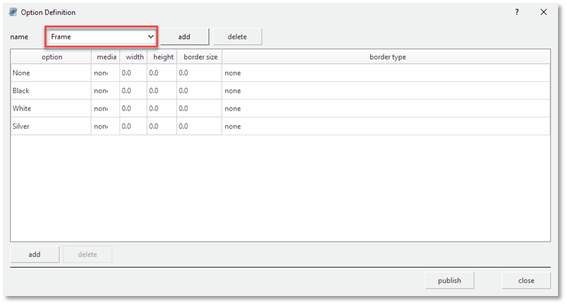
Under the option heading in the table we shall enter the name that we want to assign to the current option. We will start by defining all the sizes and their dimensions and borders. We will then continue with defining the Media list and finally the Frame list.
Click on the Publish button to create all the options on the Shopify site. Now that the Options have been fully defined, we can create our Variants from any combinations of these options. Click on the Variant icon to display the table with all the possible permutations of the options previously set.
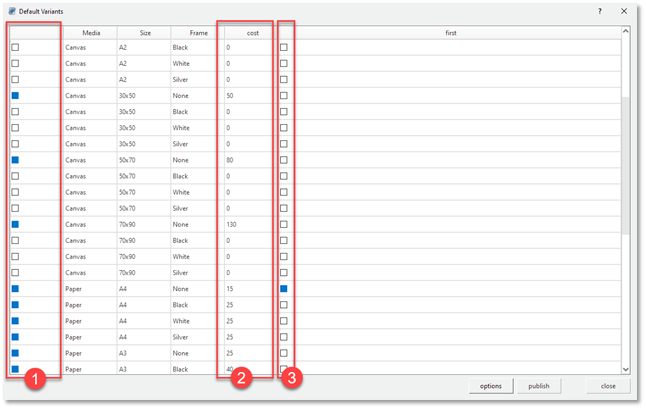
Use the first column (1) to deselect the combinations that you do not require for your products. The Cost column (2) is used to price the products in your local currency. The last column (3) allows you to set the default product that will be shown on the Shopify site for the products.
Once these parameters have been configured you can click on the Publish button to finalize and publish them to the Shopify site. A confirmation message will be shown after successful operation. It is possible to go back and edit these settings and republish them at any time if required.
Now that we have successfully defined and published the options and variants, we can start adding products to our Shopify site. Browse, search, and locate the required art pieces. You can either add these to the Shopify site individually or as a selection. To add image(s) to the Shopify site first click on the image thumbnails (1) and then click on the Shopify icon (2) to open the Shopify Publish window.
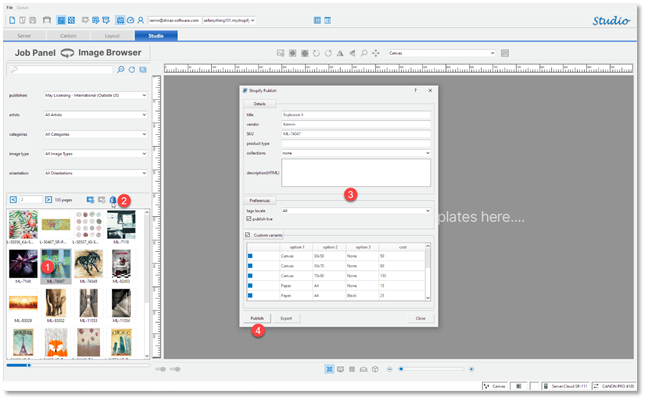
Now select and fill the additional information for the product if required. You can also add detailed description for the product using plain or HTML formatted text. The Collection category that are available on your site can also be set here so that the product will be added to it automatically. It is also possible here to deselect some of the variants and change pricing for them if needed.
Once you are happy with the setting click on the Publish button to add the product and its variants to the Shopify site. Alternatively, you can Export the items to a CSV file that you can then manually edit (if required) and import into the Shopify site using the Shopify admin panel.
Once the image has been successfully published you will receive a confirmation message. If the Publish Live option was selected when publishing, then it will be available immediately on your site and customers can order it.
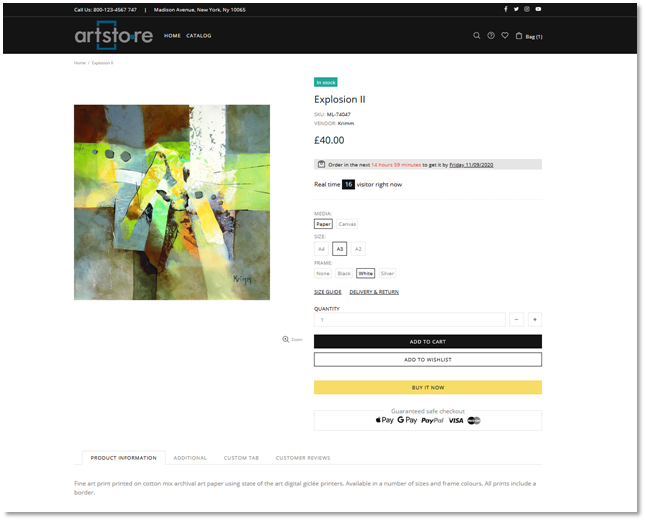
When an order is placed and paid for on the Shopify site then the job will automatically be generated and then picked-up by the allocated queues on the Rosetta Server ready for production with no additional manual work required. The Rosetta will at the point of printing use the unique print streaming technology to print the image securely and all activities will be reported back to your online dashboard for your examination.