
8.1. Server
The server module is the heart of the Rosetta solution. The engine that manages, processes and prints all incoming jobs from various sources. It can be configured to run alongside the client applications as one application (integrated) or installed on its own on a dedicated computer (client/server). In either case it looks and works exactly identical
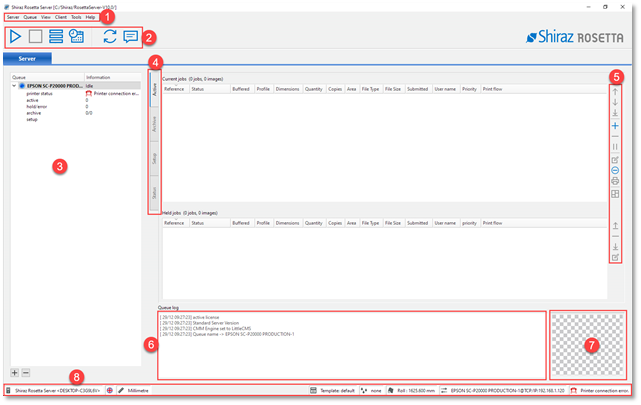
The RIP main window is comprised of several main sections as numbered in the image above. These areas are detailed below:
1. Main Menu - All the important controls and options for the RIP Server are located here. Here you can set the preferences for your setup as well as run various application tools included with the package that each carry out a specific task to help with the smooth running of the solution.
2. Queue Controls - These item each control and effect the currently selected printer queue including starting and stopping and other related queue functions.
3. Queue List - All the printer queues on the system are listed here including their current state and other important information.
4. Queue Tabs - Each printer queue on the Server includes four distinct sections that are designed to make the operation and managing of the queues intuitive and efficient. These are:
-
Active: all incoming jobs are shown here in the order of their submission and priorities.
-
Archive: once jobs have been processed and printed, they will be archived and can be re-submitted if required.
-
Setup: all the configuration for the queue are organised and contained here.
-
Status: any information with regards to the connected printer and loaded media on this queue are available here.
5. Job Controls - Selected job(s) on the queue can be individually managed using the options available here.
6. Queue Log - messages from the RIP are shown here for the operator’s convenience including progress of jobs as well as any error or warning while operating.
7. Thumbnail View - the thumbnail for the selected job (single or nests) are shown here.
8. Status Bar - various information about the Server and current queue are shown here for quick and convenient information.
We will now go through an actual job creation and submission in order to explain in more details the various information that was mentioned above.
To add additional printer queues to the Server, click on the Plus sign located at the bottom left corner of the server window.
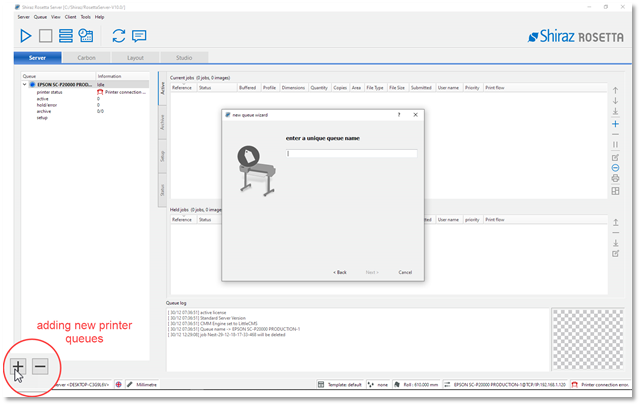
You can also use the Remove icon to delete the selected printer queue. Please note that this process cannot be undone and all existing jobs on the queue will including archived ones will be deleted forever.
The Add Queue wizard will now be run to take you through the step by step process of creating a printer queue.