8.1.2. Design Client
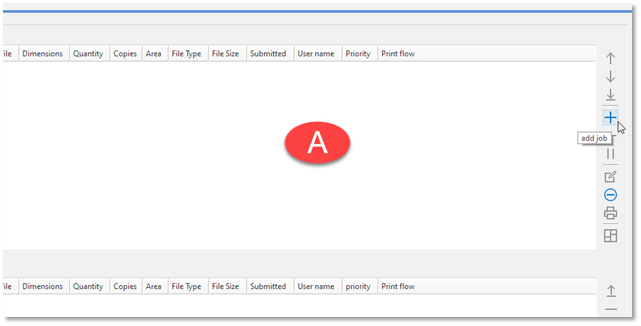
We will use the built-in client application in the Server to create our first job. To do this either click on the Add icon on the Job Controls section (A) or simply drag and drop images from a folder on the system (B).
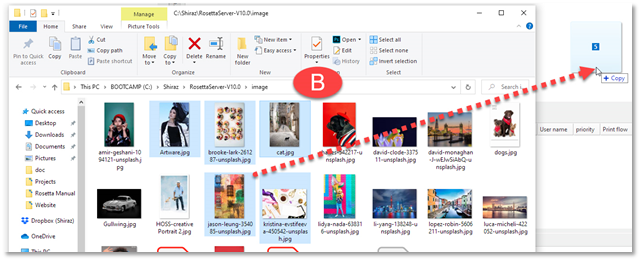
Once the images are selected or drag & dropped the Design client application automatically starts up and starts reading the images. Please note for Windows 10 and 11 operating system because of security settings drag&drop might not work when running the Rosetta RIP from the Desktop shortcut. To overcome this problem right-click on the Rosetta icon on the Desktop and then select 'Open file location' option. You should now see the Rosetta RIP Server application. You can now right-click on the application icon and select the 'Pin to taskbar' option. Now run the Rosetta from your task bar.
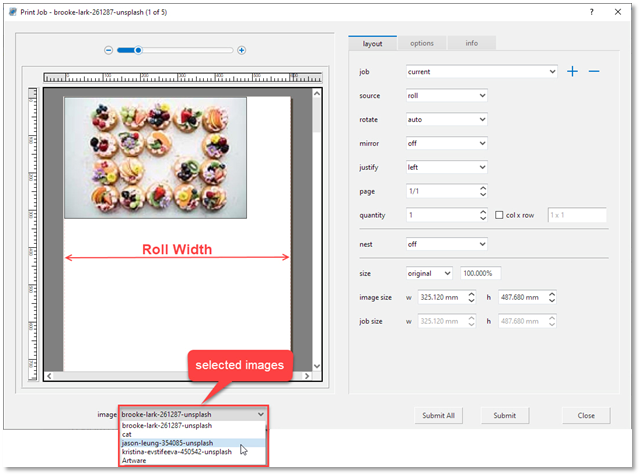
The images will now be displayed relative to the current media dimensions as set on the Status tab of the queue. You can switch between the images by clicking on the drop-down list and selecting the required image name.
Using the controls and parameters located on the Layout tab you can quickly and visually adjust the images as needed.
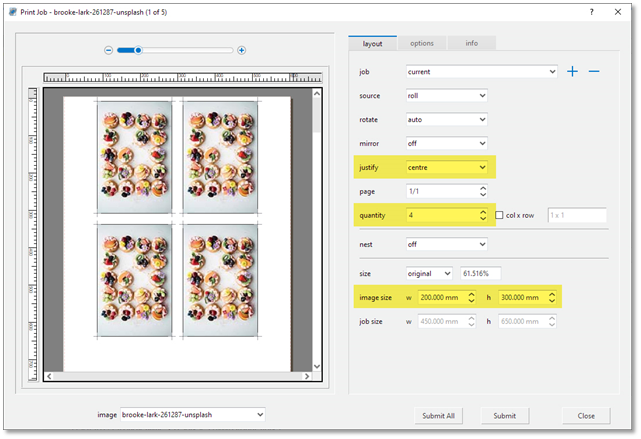
In the above case we have set the justification to Centre, quantity to 4 and the image size to 200mm x 300mm. There are additional job parameters that can be set in the Options tab such as Media Profile, Crop Marks, Print Mode and many others.
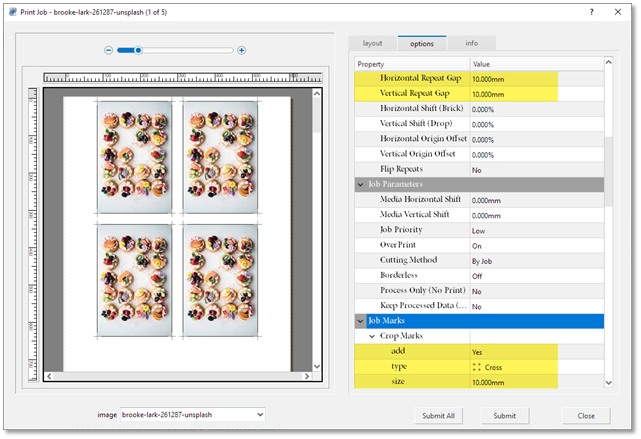
In the example above we have set the horizontal and vertical gaps between the repeats to 10mm and added crops marks to them.
The current job settings will automatically apply to all the images when we click on the Submit All button. If we only want to apply it to the current image, then we just need to click on the Submit button. Click on the Close button to exit the Design client application. The job will now appear on the Active section of the printer queue.
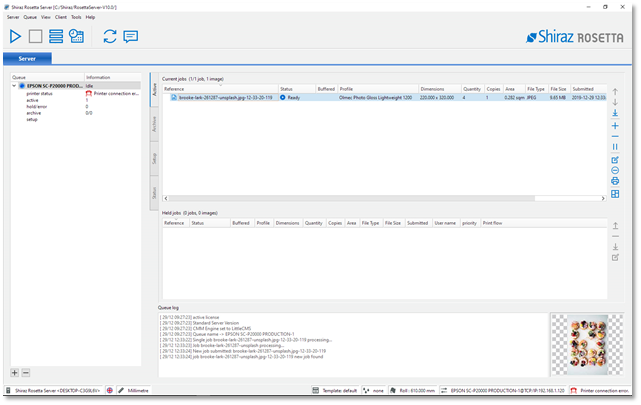
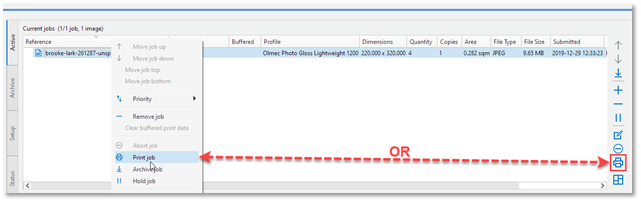
As can be seen from the above screen grab the job with its details is on Active section of the queue. Its thumbnail is also displayed when selected. To print the job either right-click on the job entry and select Print job or select the job and click on the Print icon as illustrated below.
In the previous example if we had selected the Nest option and then clicked on the Submit All then the images would have been automatically nested together for the best use of the current media dimensions.

The RIP will now create a Nest job that will contain all the images arranged for the best use of the current media as shown below:
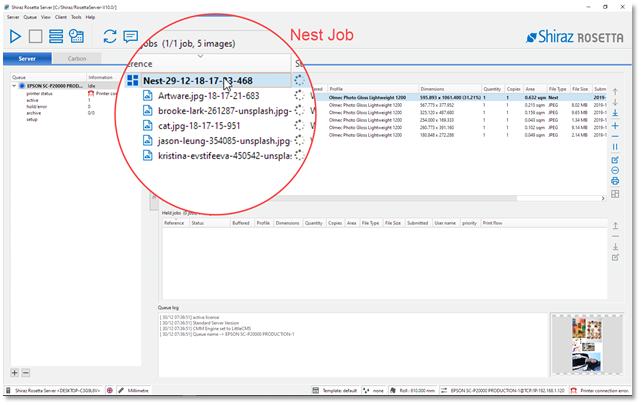
The Thumbnail View shows the arrangement when the nest job is selected. To edit or examine the nest job double-click on the nest entry. You will now see a layout of the nest with information about the it as well tools for editing it.
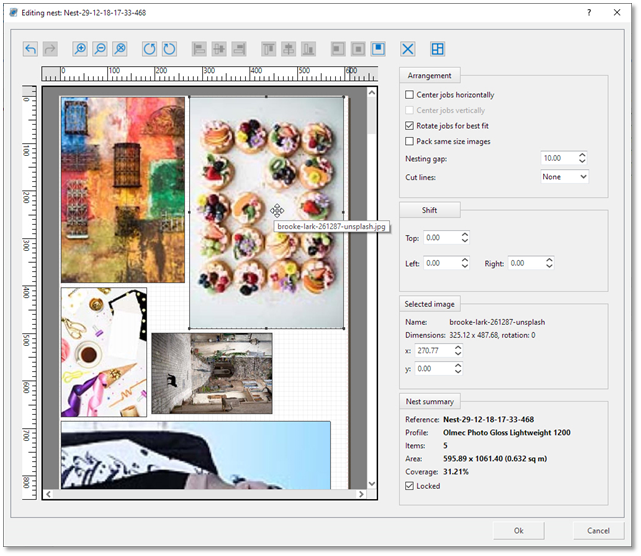
The nest arrangement can be edited manually or by using the various parameters available here. To print the nest, again either right-click on the job entry and select Print job option or click on the Print icon when the job is selected.
If you would like to bypass the Client application and submit directly to the queue you can switch off the client application by unticking this option from the Server View menu as shown below.
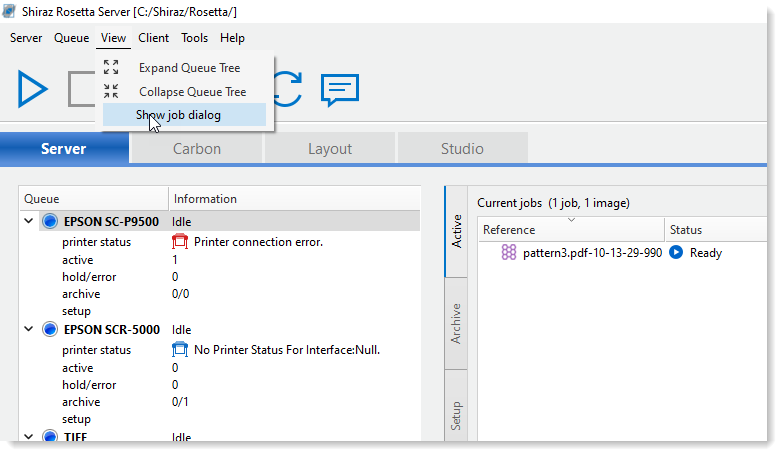
Now when you add or drag&drop images onto the server queue the RIP will bypass the client application and process and show the jobs directly on the queue.